 Perfect Exposures in a Flash
by Steve Kozak
M. Photog., CR.
PPA Certified
Can you divide 110 by 10? (110 / 10 = ?) Did you get 11 as the answer? Then you already know enough to start using your flash in manual mode. No more TTL. No more hoping your images turn out. No more relying on the camera and the flash to give you an unreliable opinion about the proper exposure. By shooting your flash in manual mode, you are in control of your images and your exposure!
It begins with a simple formula:
Guide #/Distance = F-stop.
Now, I can already hear the jeers of the youngsters saying that “Guide numbers are for geezers.” Maybe so, but we geezers never have to keep adjusting our flash because it can’t get the exposure right the first time. With manual flash, the exposure is consistent – EVERYTIME! With this simple formula, you simply divide the flash-to-subject distance into the guide number and you have your f-stop!
So what is a guide number? It is simple a rating of the output of the flash. Think of it as horsepower to an engine or the wattage of a light bulb. The guide number represents the power of the flash. The guide number varies with the ISO setting of the camera, but the standard is to express the guide number at 100 ISO.
So, a flash with a guide number of 110 at 100 ISO will give you an exposure of F22 at 5 feet. 110 / 5 = 22. No guessing. No adjusting. No problem!
The problem lies in the “so-called” features that manufacturers have added to the flash so that anyone with no experience can pick up the flash and place it on a camera and set it to TTL and get a picture with an average exposure. I never settle for average exposures…I strive to get perfect exposures! You should, too!

The “feature” that causes trouble for those of us who want control of our equipment is the flash’s “zoom” head. You may not realize that when set to “auto zoom”, your flash tracks the focal length of your lens as you zoom the lens. The result is sort of like one of those heavy duty, focus-able flashlights. By twisting the lens area of the flash light, the light beam spreads wide or narrowly focuses the beam. The problem is, it so much brighter when the beam is focused and extremely dim with the light is spread.
Now, imagine that happening with your flash. When you are at wide angle, the flash is spread over a larger area to cover your wide angel of view, but it is very dim. When you focus to telephoto, the beam is focused to a very confined area (angle of view), but is now much more intense. That is a pretty lousy problem for a photographer to have!

The fact is, the exposure of your flash is changing because you had the audacity to zoom your lens. How dare you want to zoom your lens!
S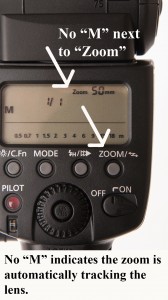 o how do you keep your flash from getting dimmer or brighter when you zoom your lens? You turn the auto zoom off! With the auto zoom head turned off, the flash no longer tracks your zoom on the camera. You are free to zoom without penalty of the flash output changing because now, your flash output will be consistent!
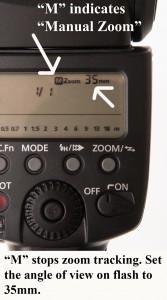 If you are using the Canon 580EXII, 600EXII or the Nikon SB900 or SB910, set your flash zoom head to Manual Zoom at the 35mm setting, and now your flash has a guide number right around 11o. This means, you will get consistent flash exposures every time and you can now use the formula, GN/Distance=f-stop with reliability!
I have also found that the angle of view at 35mm provides sufficient coverage from edge to edge for almost all of my wide angle images. There may be something of a coverage issue if you are using extreme wide angle lenses with a flash mounted on your camera.
Other flash brands and models should also try locking the flash to a 35mm fixed angle of view. Not all flashes have this zoom head feature and not all flashes will have a guide number of 110 at this setting. Be sure to check your instruction book or visit the TPPA Club Central if you have questions.
There are still two more missing pieces of the puzzle: the shutter speed and the selective output settings of the flash.
Our formula for flash exposures gives us the f-stop, but does not give us a shutter speed. This is because the shutter speed for flash exposures is determined by the camera…sort of. The truth is, the fastest shutter speed that can be used with a flash is determined by the camera, and is known as the “sync” speed.
The “sync speed” synchronizes the shutter with the flash so that the flash fires – once the sensor is completely unobstructed by the shutter or curtains and mirror inside the camera body. If these elements are not out of the way of the sensor when the flash fires, the camera is said to be “out of sync” and the result is a portion of your image does not record the exposure of the flash.
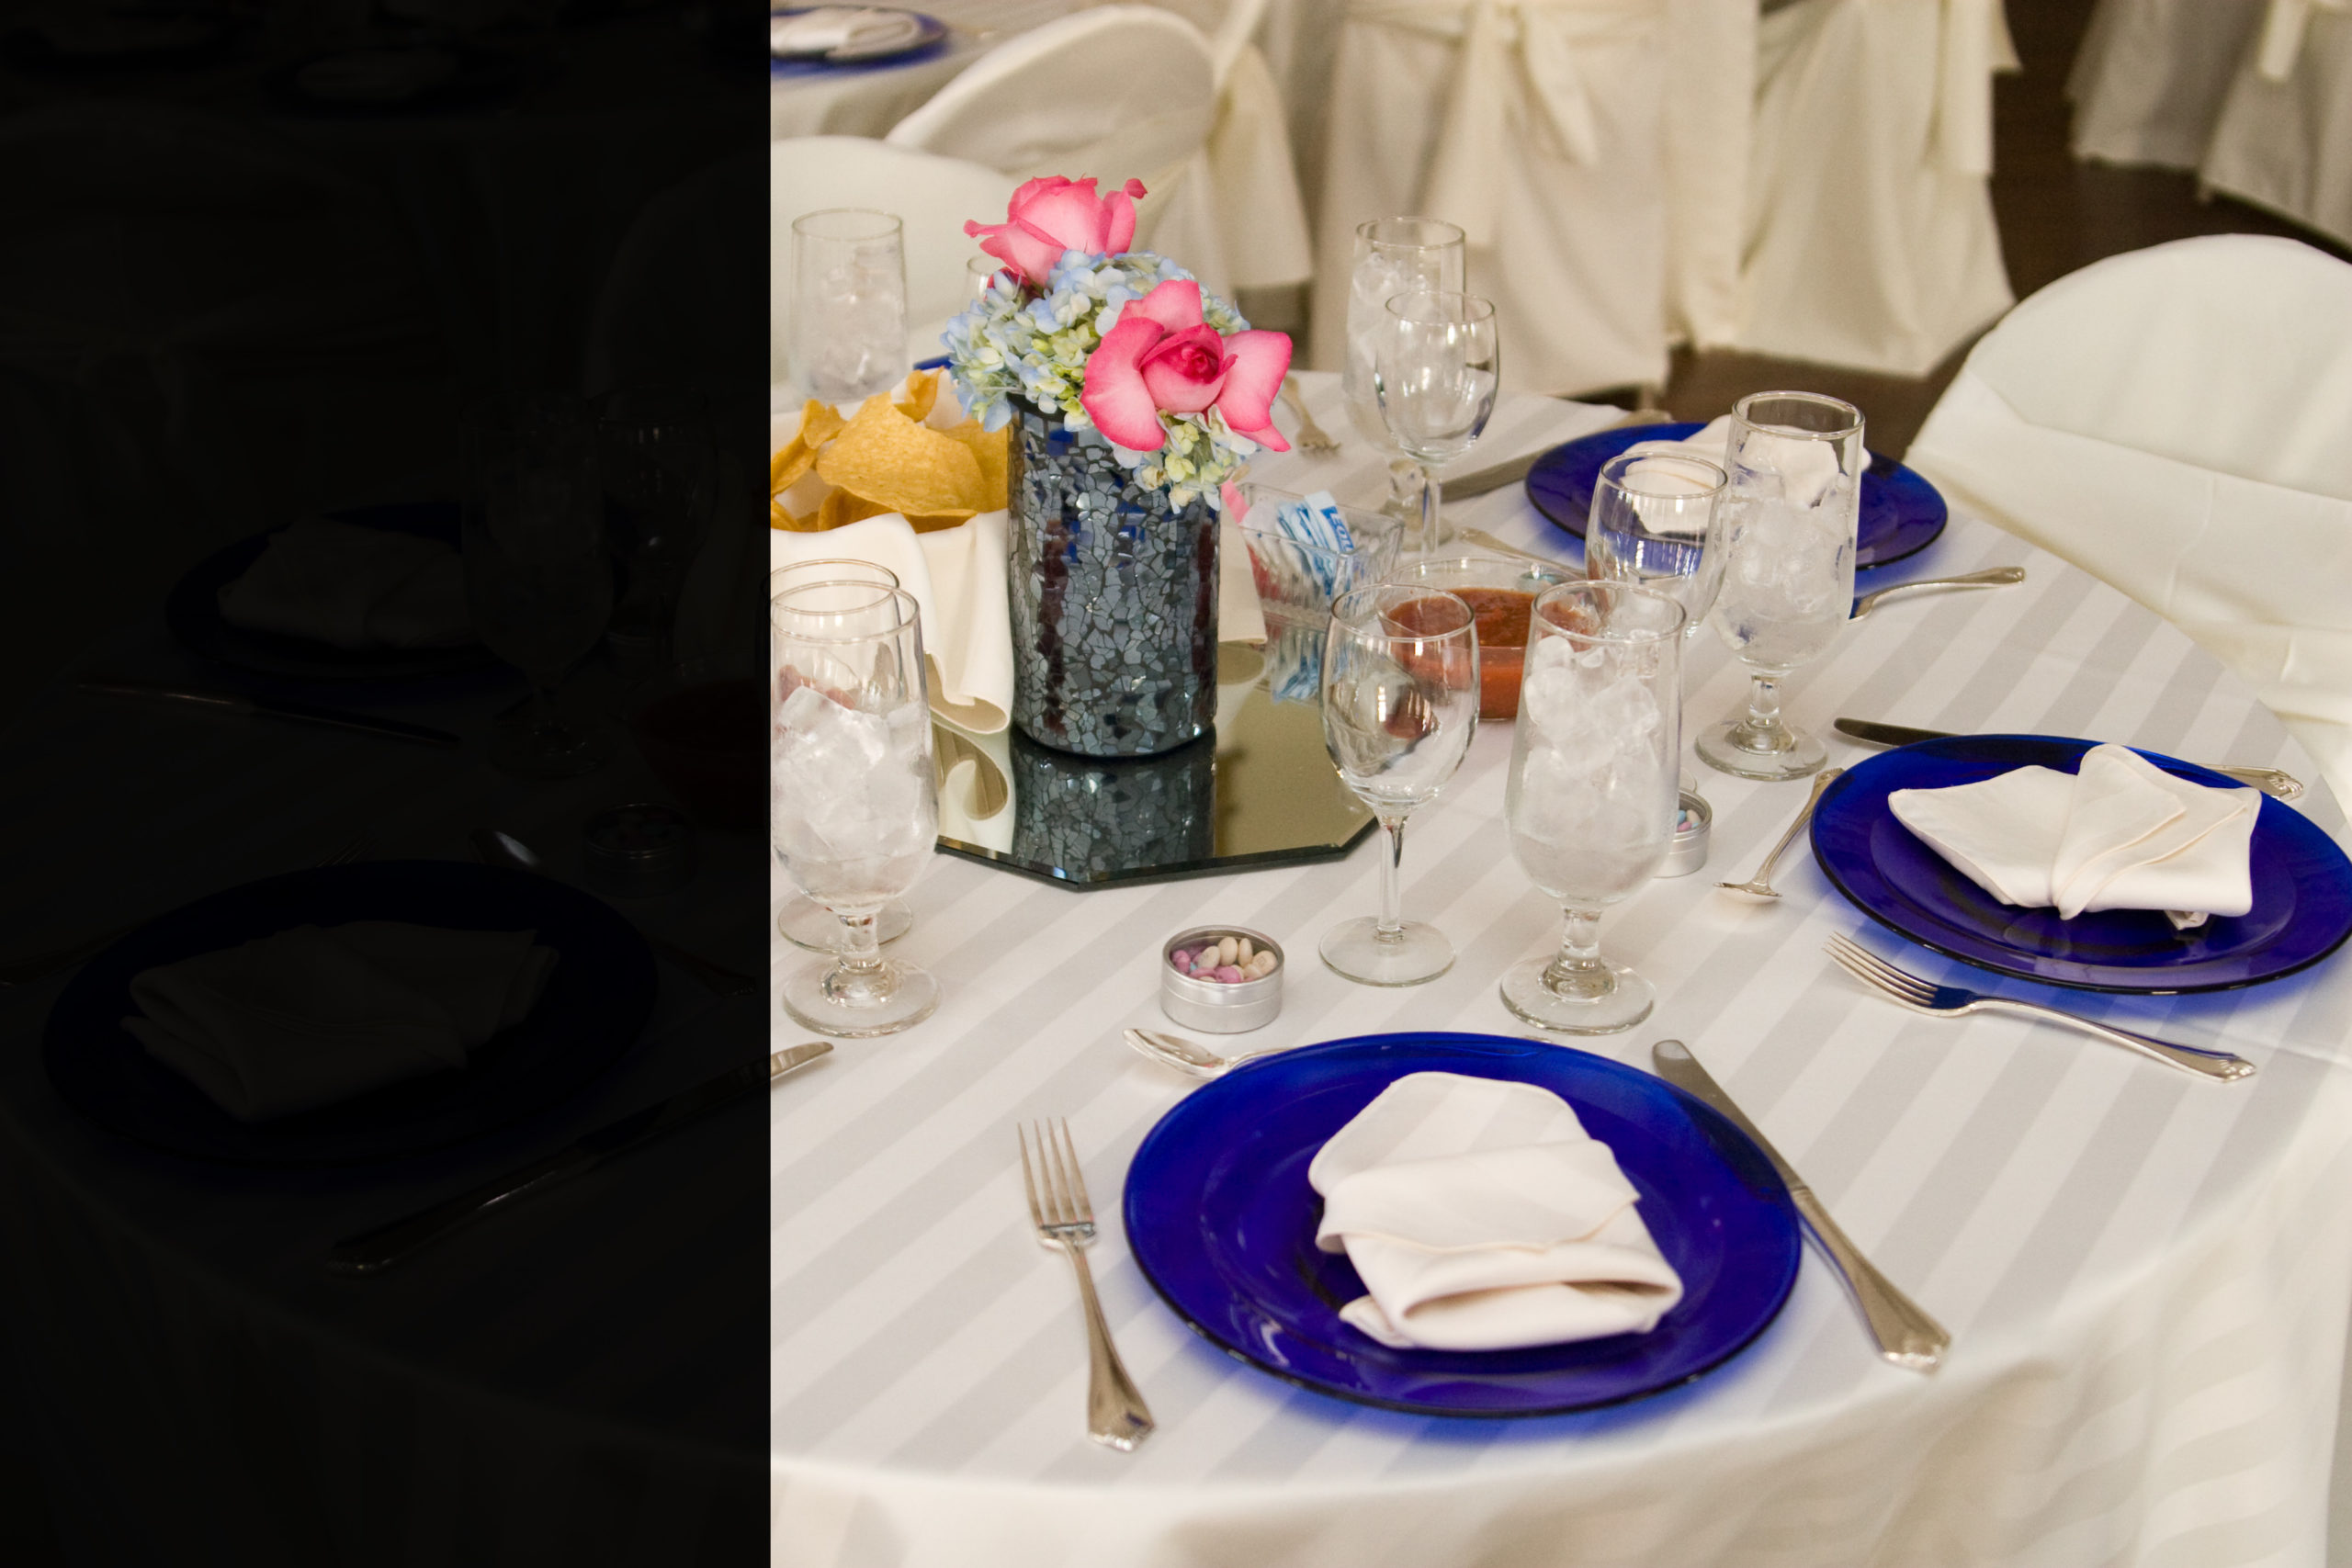 Think of the curtain or mirror as a door from one room to another. If you open the door all the way and fire your flash into that room, there is no obstruction and your flash is properly recorded. However, if you only open the door slightly and fire your flash, the light does not get passed the door and into the room. That is how it is with a camera out of sync with the flash.
With most cameras, the sync speed will be from 1/125 to 1/250. I suggest using 1/125 which is well within the sync of most pro cameras. The fact is, you can use any speeds slower than the camera’s stated sync speed, you just cannot use speeds faster than the stated sync speed. We will cover more of this in a future article.
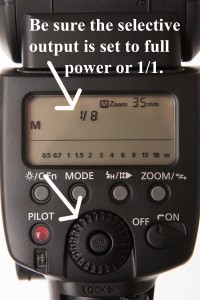 The final setting we have to check is the selective output settings on your flash. This is the control that acts just like a dimmer switch with the lights in your home. You can turn the flash all the way up to full power, or you can set your dimmer switch to power down the output of the flash for more control.
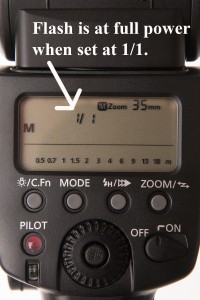 You want to make sure the setting on this dial is set at full power, which is represented as 1/1.
These selective output settings allow us to completely control the output of our flash to get exactly the exposure we want. We will talk more about these controls in the next lesson.
So, here are the parameters I recommend for getting started with manual flash:
- Camera set at 100 ISO
- Shutter speed set to 1/125
- Flash mode set to “M”
- Zoom set to “Manual Zoom” at 35mm
- Flash output set to full power or 1/1
Once you start using manual flash, your exposures will be consistent, and the control of the lighting will be in your hands.
Let’s see what you have learned by taking this short quiz:

